Optimize NVIDIA Control Panel settings for gaming performance
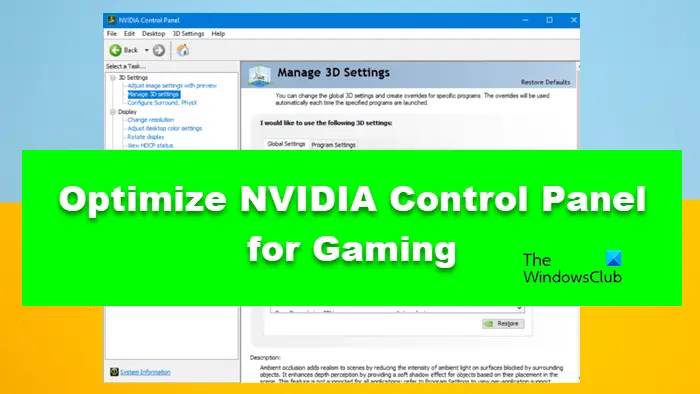
Before tweaking the settings, you need to first launch NVIDIA Control Panel. The best way to do the same is by right-clicking on the desktop and selecting NVIDIA Control Panel. Then, go to 3D Settings > Manage 3D Settings, this is the panel where you can make all the changes: Let’s see the function of each setting.
1] Image Sharpening
Image Sharpening may sound exciting to you as it adds some extra bit of sharpness to your game. One of the arguments that go in its favor is that you can lower the game’s resolution, and enable Image Sharpening and you are good to go without putting a lot of load on your computer. However, in reality, the added bit of sharpness is barely perceivable and the performance increase is not substantial, in some cases, turning on Image Sharpening can put extra load on the GPU decreasing its sustainable performance. You can find this feature in NVIDIA Control Panel > 3D Settings > Manage 3D Settings > Image Sharpening. We recommend you disable this feature if it’s enabled. Read: Best Router settings for PC Gaming; Optimize Router for better Gaming
2] Ambient Occlusion
Ambient Occlusion enhances the Shadow effect allowing you realistic gameplay by improving the physics of the game. This way, you will be able to notice every little detail that wasn’t noticeable before. There are three options: SSAO (Screen Space Ambient Occlusion), HBAO (Horizon Based Ambient Occlusion), or HDAO (High Definition Ambient Occlusion). In reality, this setting isn’t very helpful, that’s why it should be turned off. If your game has a similar feature, just enable it from the game’s settings as that will be more beneficial. The Settings are under the Manage 3D Settings option.
3] Antialiasing
If you want to have smooth edges then go for Antialiasing. There are three kinds of Antialiasing in NVIDIA Control Panel, let us talk about all of them.
Antialiasing- FXAA: It should be turned off as most games don’t support this feature, but if you know there is a game in your library that supports FXAA, you can enable it.Antialiasing- Gama Correction: Enabling it will help your game to manage Gama.Antialiasing- Mode: Set it to Application-controlled to avoid any conflict.Antialiasing – Transparency: Turn it off as it puts way too much load on your system and decreases its FPS
Just configure all the Antialiasing menus according to the aforementioned way and you will be good to go. Read: Tips to improve gaming performance in Windows PC
4] DSR Factors
From the name, Dynamic Super Resolution, we can get a hint about its functioning. If you are thinking about changing the resolution using DSR Factor then you are right. DSR Factor is almost similar to Radeon Virtual Super Resolution. Using this setting, in simple steps, you can have 4K resolution on a 1080P screen, hassle-free. Just keep in mind, if you have an inferior computer, avoid this setting, or just don’t go all the way to 4K. You can also tweak the DSR Smoothness option to increase or decrease the graphics. Read: Bottleneck in Gaming explained
5] Low Latency Mode
Depending on what kind of latency you are experiencing, you can either enable or disable this feature. If you experience input lag, go ahead and turn it on, if not, leave it turned off. Just make sure to make this setting global, as it can affect all games in an unprecedented manner.
6] Max Frame Rate
Max Frame Rate is a one-in-all kind of feature that will help you out if you want to save power or want low latency. You can find Max Frame Rate in NVIDIA Control Panel > 3D Settings > MaxFrame Rate. It allows you to set the game frame rate and reduces the GPU frequency when used together with Power Management set at Optimal Power, thus long battery life. However, if you want to have low latency then enable Max Frame Rate with Power Management set at Prefer Maximum Performance. However, make sure to make this setting global as well, just configure it on a game-to-game basis, and see if you notice any performance difference. Read: How to optimize Windows for Online Gaming.
7] Multi-Frame Sampled AA
If you want to have an MSAA-like Antialiasing feature but no compromisation in your performance then Multi-Frame Sampled AA or MFAA for short should be your pick. Although there will be a slight difference in the visual quality, you will have better performance, and for gaming that matters a lot. Keep in mind that MFAA can only be used when an application that supports 2x MSAA or greater is rendering a file. To enable MFAA, launch the NVIDIA Control panel, then click on Manage 3D Settings > and switch on Multi-FrameSampled AA (MFAA). You can keep this feature enabled Globally as there will be no conflict.
8] OpenGL rendering GPU
If you are running an OpenGL application on your PC and have multiple GPUs, OpenGL Rendering GPU is the one for you. The feature come in handy when you have two GPUs but don’t know which one to use for better performance. In such cases, you can click on Auto Click to allow the driver to select the best GPU for that particular purpose. However, if you are certain which one is the best, pick the same from the drop-down menu.
9] Power Management Mode
Power Management Mode allows you to control your GPU when playing any DirectX or OpenGL games. Adaptive, Prefer maximum performance and Optimal performance are the three options that you can use accordingly to optimize NVIDIA for gaming.
10] Texture Filtering
Texture Filtering as the name suggests is used to determine the texture quality of the screen and you will have a better gaming experience. In Texture Filtering, there are four options, let us talk about each one.
Texture Filtering – Negative LOD Bias: Set it to Clamp if you don’t want glitches.Texture Filtering – Quality: Set it to Quality.Texture Filtering – Trilinear Optimization: Choose On.Texture Filtering – Anisotropic Sample Optimization: Turn it off.
Once you have made these changes, let us go to the final settings.
11] Vertical Sync
Vertical Sync or commonly known as VSync adjusts the refresh rate according to the frame rate of your monitor. Doing so allows you better image quality as this stops screen tearing and there will be no more glitches and horizontal tearing on your screens. However, keep in mind, since it synchronizes the game’s FPS to that of your Monitor, keeping it as a global setting can cause serious conflicts, so, go to the game you want to configure and then enable this feature. These were some of the best settings that you can configure in the NVIDIA Control Panel. We have mentioned all of them, as they should be not changed and left to their default settings. Keep in mind, you may not have to make all the changes mentioned here, or maybe not all changes work for you. Read: NVIDIA Control Panel missing on Windows
How do I set NVIDIA for best performance?
To optimize NVIDIA Control Panel for gaming, you need to change some settings from the program. This will allow you to have a better gaming experience and use your GPU to the fullest. We have mentioned all the settings that you need to configure to optimize your settings.