Windows is easy to use because most of the error messages give you a hint of the origin of the issue. From the error message, it’s clear that your system can’t browse or connect to networks because Network discovery is disabled. If you’re experiencing this issue, don’t fret because you only have to go and enable Network Discovery manually. In this guide, I’ll show you how to enable this setting, unblock it from the firewall, and other troubleshooting solutions for the issue.
Network discovery is turned off and not turning on
If Network Discovery is not working, then to enable Network discovery and clear the error message, follow these troubleshooting steps: In the section that follows, we’ll explore these fixes in detail.
1] Restart your PC
The problem could be caused by a malfunctioning process or service. A simple restart fixes many minor software glitches. For this solution, don’t merely, hit the Restart button. To better fix this issue properly, power off your system from Start Menu > Power > Shut Down. Allow your PC to go completely off. Leave it for around 2 minutes before powering it back on.
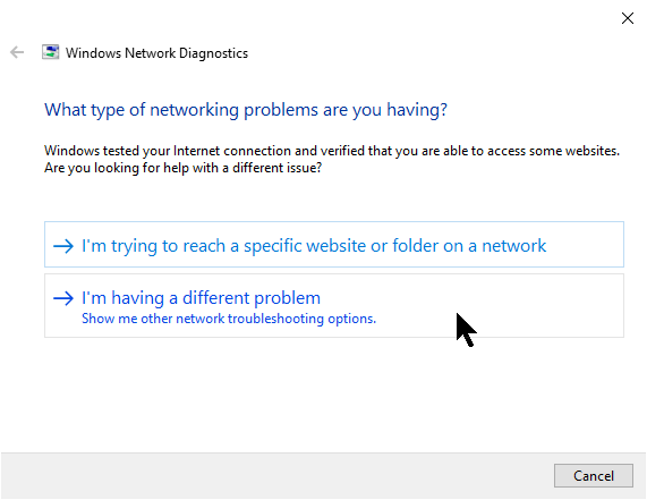
2] Run the Network troubleshooter
Right-click on the Network icon in your taskbar.Select Troubleshoot problems.Follow the troubleshooting steps presented on the screen.
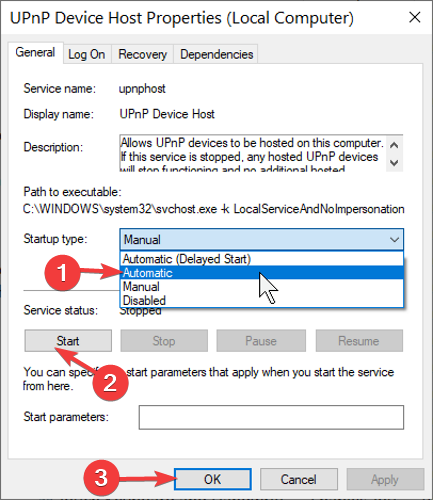
3] Start the required dependency services
Press the Windows Key and R.In the Run dialog box, type services.msc and hit ENTER.Right-click on the UPnP Device Host service.Select Properties.Select Automatic from the Startup type dropdown menu.Click the Start button if it’s clickable and hit OK..Repeat steps 3 and 4 for the following services also:– Function Discovery Resource Publication– SSDP Discovery.– DNS Client.Restart your computer.
4] Enable Network discovery
To enable Network Discovery, press the Windows Key and search for windows defender firewall. Select Windows Defender Firewall from the results. Click on the Allow an app or feature through Windows Defender Firewall link on the left panel.
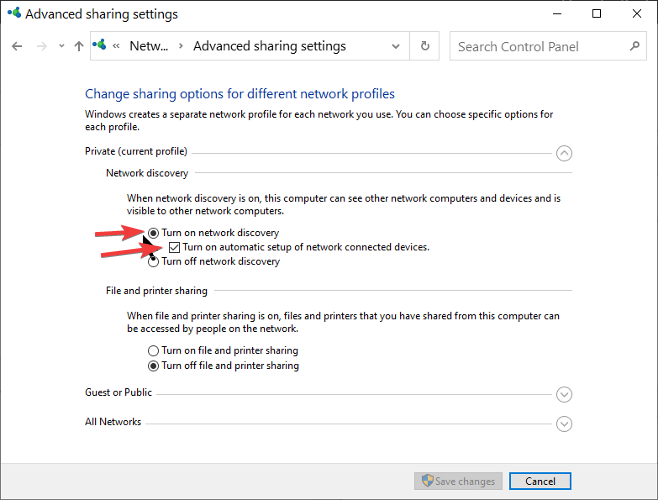
Hit the Change settings button. If prompted, sign in as an Administrator. Find Network Discovery from the list. Mark the checkbox on the left, as well as the Private and Public checkboxes at the extreme right. Click on the OK button below. Press the Windows Key and search for Control Panel. Click on Control Panel from the results. Go to Network and Internet. Click on View network status and tasks. Navigate to Change advanced sharing settings. Switch to the Turn on network discovery option. Mark the checkbox labeled Turn on automatic setup of network-connected devices.
5] Set the network sharing mode
Click on the network icon on your taskbar. Right-click on the network you want to fix and select Properties. Select Private in the Network profile section.
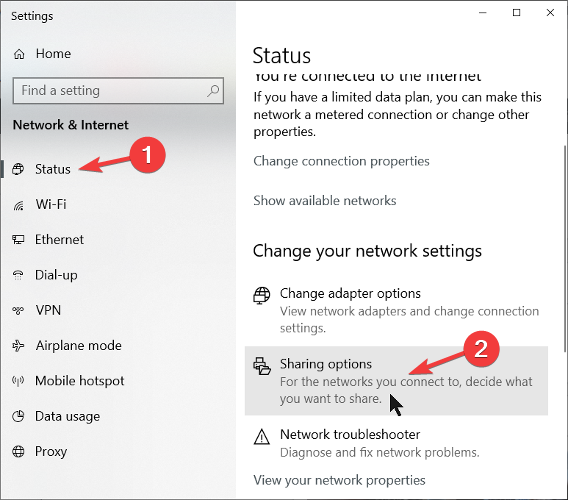
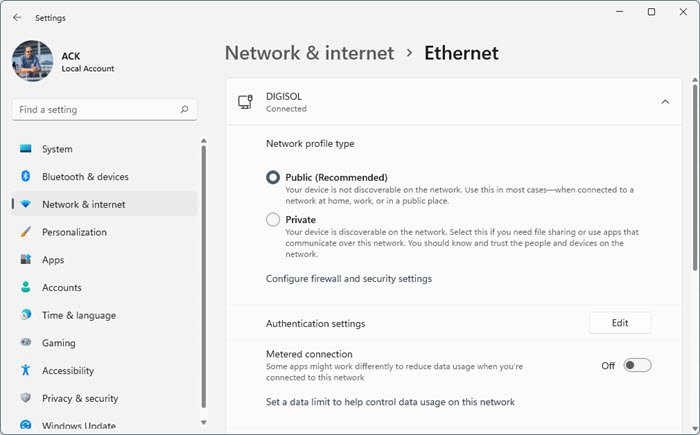
Click on the back button at the top left-hand of the window. Navigate to Status on the left panel. Go to Sharing options. Select Turn on network discovery. Mark the checkbox beside Turn on automatic setup of network-connected devices. Click Save changes. In Windows 11, you will see the settings here:
Open Settings > Network and internet. Locate the network you are connected to and select Properties to open the above window. These methods should get rid of the problem on your Windows 11/10 computer.
6] Use Network Reset
If nothing helps you, use the Network Reset feature. It should work! All the best!