Microsoft Excel Tutorial for Beginners
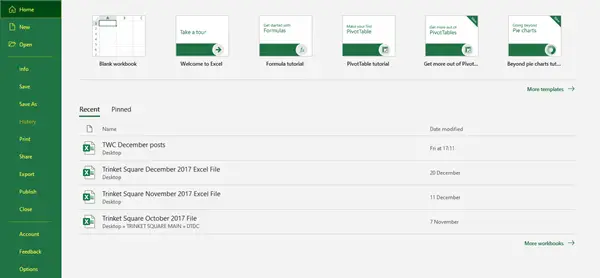
To open Microsoft Excel, click on the Start button and scroll down to Excel under the Microsoft Office option; or simply search for it in the search box. Click on Blank Worksheet to begin. This is how a Blank Worksheet looks like.
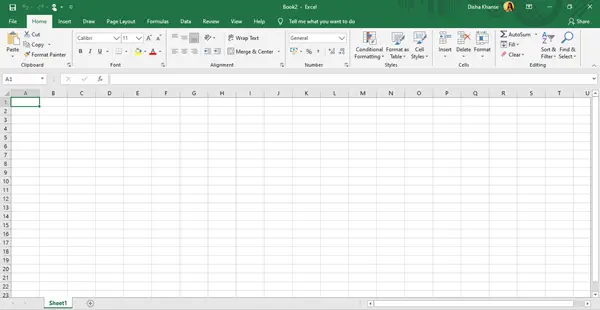
You will see several tabs in the Ribbon at the top of the worksheet such as Home, Insert, Draw, Page Layout, Formulas, Data, Review, View, Help, and File. Let us go through each one of them.
1) Home
The Home tab is the default tab in the Microsoft Excel Worksheet. This tab includes sections such as Clipboard, Font, Alignment, Number, Styles, Cells, and Editing.
The most important of all is Font and Alignment where you can choose a new font for your text from a variety of options available, change the size and color of the font, align your content to left, right or center, and also align text to top, bottom or middle. You can make your text bold, italicize it as well as underline or double underline it. You can apply borders to the selected cell and also change the background color of the same in order to make it stand out. You can combine and merge the selected cells into one large single cell.
Under Wrap Text, you can wrap and fit in extra long text into multiple lines so that it appears properly.
In the Number section, you can choose the format for your cells such as number, currency, date, time, percentage, fraction, etc. In the Styles section, you can format selected cells to a table with its own style and choose a colorful cell style to highlight important data or content. Under Cells, you can insert or add new cells, rows, columns, and sheets as well as delete them. You can adjust the row height, column width, hide and unhide rows and columns, rename as well as move or copy sheets. In the Editing section, you can find and replace text with something else, sort and filter your data as well as carry out various functions such as average, sum, max, min, etc. in an efficient manner. Read: Microsoft Excel time-saving tricks for fast working.
2) Insert
The Insert tab comprises of Tables, Illustrations, Add-ins, Charts, Tours, Sparklines, Filters, Links, Text, and Symbols.
In the Tables section, you can add a table to organize, sort, filter and format data. Under Illustrations and Charts, you can add pictures from your computer as well as online. You can add shapes, icons, 3D models, SmartArt, charts, pie, map chart, PivotChart, etc. Links will allow you to add a hyperlink in your document which will give you quick access to other webpages and files.
From the Text and Symbols sections, you can add a text box, a header and a footer, WordArt, signature line, object, equation, and symbol. Read:
10 most useful Excel Tips and Tricks for beginnersAdvanced Microsoft Excel Tips and Tricks for Windows users
3) Draw
In the Draw tab, you will find three groups such as Tools, Pens, and Convert.
You can add a pen, pencil or a highlighter to draw shapes; and also, erase the ink if done wrongly. Read: List of best free Excel Add-ins you should be using
4) Page Layout
The Page Layout tab includes a wide number of commands related to Themes, Page Setup, Arrange, Scale to Fit, and Sheet Options.
Under Themes, you can change the font and the color palette, and add different effects to change the look and feel of the document. You can directly choose a ready theme in order to make your document look pleasant and attractive.
The Page Setup group allows you to set and adjust the margin sizes as well as change the page orientation and paper size of the document. A picture as a background can also be added. View the Scale to Fit options to shrink the width or height of your printout to fit a certain number of pages.
5) Formulas
Under the Formulas tab, you will categories such as Function Library, Defined Names, Formula Auditing, and Calculation.
For a beginner, all this will look pretty complex. So, the basic things you need to understand are how to perform the auto sum functions like sum, average, etc. and how to calculate formulas. After having selected the data from the cells, click on the dropdown menu of the auto sum command from the Functions Library and then select the function you wish to perform. In the Calculation category, you can choose to calculate the formulas automatically or manually. Simply, click on the dropdown menu under calculation options.
6) Data
In the Data tab, you will find different sections named Data Tools, Queries and Connections, Sort and Filter, Get and Transform Data, Forecast, and Outline.
You can extract data from multiple sources like the web or any recent sources. You can validate the data by setting the rules for validation and remove duplicates by selecting the column that you want to check. Read: Top 15 Financial functions in Microsoft Excel
7) Review
The Review tab features commands related to Proofing, Accessibility, Insights, Language, Comments, Protect, and Ink.
The Spelling function will check for all typos and grammatical errors in your document and will ask you to review them accordingly. In case of confidential or important information, there is an option to protect your sheet or workbook. This prevents others to make any changes to the document or move, add or delete sheets. The information thus remains safe and intact.
8) View
In the View tab, you will see sections such as Workbook Views, Show, Zoom, Window, and Macros.
You can see your document in normal view; or in page break view, where you can view how your document will look like when it is printed.
9) Help
The Help tab aids you to get help by using Microsoft office or by contacting an Office Support Agent. You can learn more about Excel by going through online training. You can give suggestions and feedback as well.
10) File
The File tab includes commands to save, print, share, export, and publish the document. You can also access the additional Excel options and make the necessary changes to the settings.
In this way, by using these tips and tricks, you can make your Excel document look well organized and presentable in an efficient and most convenient manner. I hope this tutorial on Microsoft Excel was helpful. Now read: Microsoft Excel Online tips and tricks to help you get started.