The Troubleshooters are primarily included to resolve the issues that may occasionally occur in our laptop or computer and to automatically fix it and keep its history so if the same error or problem arises again it gets fixed automatically by the troubleshooter without hampering the user performance. Below is a list of troubleshooting errors that can be fixed by any of these troubleshooters.
Errors while connecting to the internet and other connectivity-related issues.Errors while playing sound/audio or while playing movies or videos.Printing-related problems.Errors preventing Windows from being updated.Bluetooth problems with connecting your PC to other devices.Connection issues with incoming connection requests due to firewall settings.Wireless and other network adapter issues.Problems with the computer’s power settings to conserve power and extend battery life.Compatibility errors such as an older version of a program running on the new version of Windows.Sound recording-related issues like microphone not being detected by your device.Windows search issues.Issues with sending/receiving files and folders with other devices.Microsoft Store app issues.
Read: How to run Troubleshooter in Windows from the command line
How to View and Clear Troubleshooting History in Windows 11/10
The inbuilt Troubleshooters in Windows 11/10 automatically detect and solve any issue that has been encountered on your device. Whenever the trouble-shooter runs on the system, the device maintains a history of Troubleshooter. The troubleshooting history applet contains the list of troubleshooting problems that were solved by the troubleshooter on which date and at what time. We will discuss this topic under the following subheadings: Let’s see them in detail.
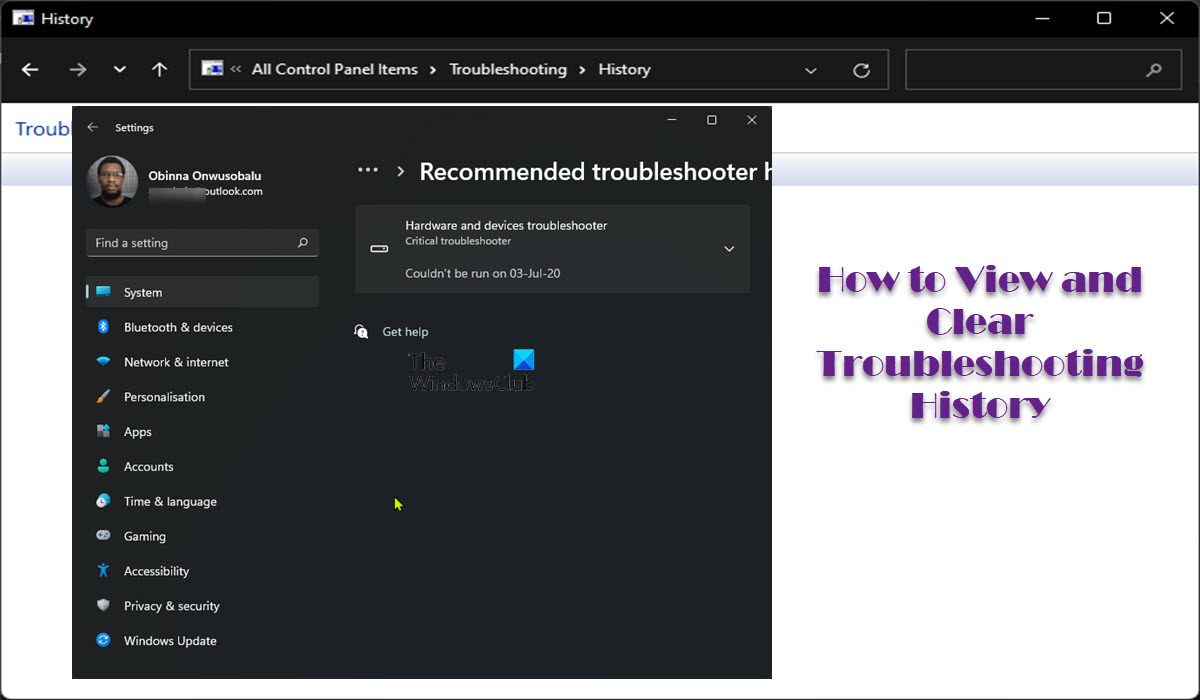
1] View Recommended Troubleshooting History
Depending on the issue you’re having on your Windows 11/ 10 PC, you may want to first view the Recommended troubleshooting history as suggested and as part of the system maintenance that automatically runs periodically on your system. Recommended troubleshooting is a feature designed to fix certain issues on the device automatically when they are detected. To view Recommended troubleshooter history in Windows 11, do the following:
Press the Windows key + I to open the Settings app.Navigate to System > Troubleshoot.Click Recommended troubleshooter history.Now, the recommended troubleshooter history (if any are available) for the computer will be listed.You can now run the troubleshooter or exit the Settings app.
To view Recommended troubleshooting history in Windows 10, do the following:
Press Windows key + I to open the Settings app.Go to Update and Security.Click Troubleshoot on the left navigation pane.Click on the View history link on the right pane.Now, the recommended troubleshooting history (if any available) for the computer will be listed.You can now run the troubleshooter or exit the Settings app.
Read: Make Windows run Troubleshooters automatically when required
2] View Troubleshooting History and Details
After you run Recommended troubleshooting or you manually run one or more Troubleshooters to automatically fix the issue(s) on your Windows 11/10 computer, the system keeps a record of or stores troubleshooting history which you can review at any time to understand what issues were addressed and fixed by the troubleshooter. To view Troubleshooting History and Details, do the following:
Press the Windows key + R to invoke the Run dialog.In the Run dialog box, type control and hit Enter to open Control Panel.From the top right corner of the window, set the View by option to Large icons or Small icons.Click Troubleshooting.Next, click/tap on the View history link at the top left corner in Troubleshooting.If you are currently logged in as an administrator, then you can click/tap on the Include trouble-shooters that were run as an administrator link if you want.Now, to view the details of a selected troubleshooter you had run, do either of the following:Select a listed troubleshooter and click/tap on View details on the menu bar.Double-click/tap on a listed troubleshooter.Right-click or press and hold on a listed troubleshooter and click/tap on View details.Exit Control Panel when done.
Read: How to find and view BSOD log files in Event Viewer Windows
3] Clear/Delete Troubleshooting History
Troubleshooting history appears to be just small log files and does not take up too much space. However, there are reported cases by some PC users where they get the following system maintenance error message on boot or when they manually run the System Maintenance Troubleshooter: Going by the above notification, it’s safe to assume that with time as you run these native Troubleshooters, the troubleshooting history accumulates and takes up a sizeable amount of storage space on your local drive which at some point you may want to clear or delete this stored history. To clear/delete Troubleshooting History, do the following:
Navigate to Troubleshooting in Control Panel.Next, click/tap on the View history link at the top left corner in Troubleshooting.If you are currently logged in as an administrator, then you can click/tap on the Include trouble-shooters that were run as an administrator link if you want.Now, to delete a selected troubleshooter from troubleshooting history, do either of the following:Select a listed troubleshooter and click/tap on Delete on the menu bar.Right-click or press and hold on a listed troubleshooter and click/tap on Delete.To clear all Troubleshooting history for all troubleshooters, click/tap on Clear history on the menu bar.Exit Control Panel when done.
Using Command Prompt
To clear all User Troubleshooting History, including all troubleshooting history from troubleshooters that were run as the current user in Command Prompt, run the command below:
To clear all Administrator Troubleshooting History, including all troubleshooting history from troubleshooters that were run as administrators in Command Prompt, run the command below in the elevated CMD prompt:
Exit Windows Terminal when done.
Read: How to clear Windows Update History in Windows That’s it! These posts might interest you:
How to view and clear Activity History on WindowsHow to clear Windows Search History and remove Recent ActivitiesHow to delete YouTube Search History on PC
How do I fix the Troubleshooting history is taking up disk space?
Some PC users will get this system maintenance notification when they boot their Windows 11/10 computer or when they manually run the System Maintenance Troubleshooter. To resolve the Troubleshooting history is taking up disk space issues, you simply need to clear/delete Troubleshooting History for a specific troubleshooter or all troubleshooters.
How do I view Activity history in Windows 11?
To view activity history, depending on your version of Windows, follow these steps: In Windows 10, select Start, then select Settings > Privacy > Activity history. In Windows 11, select Start, then select Settings > Privacy & security > Activity history. Read: How to disable Activity History permanently in Windows
How do you check the problem history in Security and Maintenance?
Open Control Panel, click System and Security. On the next window, select Security and Maintenance. Once the Security and Maintenance window opens, expand the contents of the Maintenance section. Click the View reliability history link. Now wait for your report to generate – you can sort your computer reliability by Days or by Weeks.