Clear Display cache in Windows 10
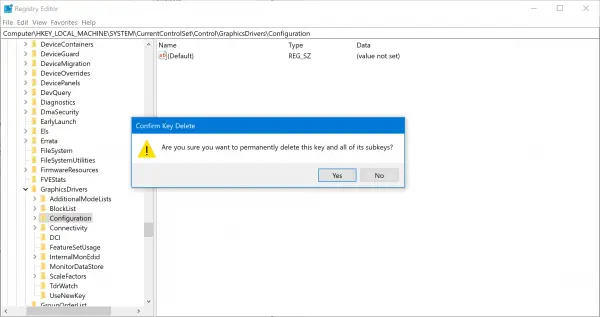
To do this, you will have to open the Registry Editor. But before you do this, we recommend that you create a system restore point first or backup your Registry. Having done that, navigate to the following location: Delete the following keys:
ConfigurationConnectivityScaleFactors
Select Yes when you see the confirmation box when asked to confirm. Restart your computer and your display configuration and settings will be reset to Windows defaults.
What we did here was to force Windows 10 to forget the monitors and their respective settings stored on the computer. So, the next time you connect to an external display, it will be treated as a newly connected display, and you will begin with the default and optimal values to work again. This fix can be very useful when you connect to an external display, and find that the output is not to your satisfaction. If you find that the results are not to your satisfaction, you can always use the created restore point to restore your computer. A bunch of posts on this website that will help you reset other functions or software: Reset Windows 10 PC | Reset all Local Group Policy settings | Reset Surface Pro devices | Reset Windows password | Reset Touchpad settings | Reset WinHTTP Proxy Settings | Reset WMI Repository | Reset Data Usage.