Remove Background image with Paint 3D
How to make Background Transparent in Paint 3D
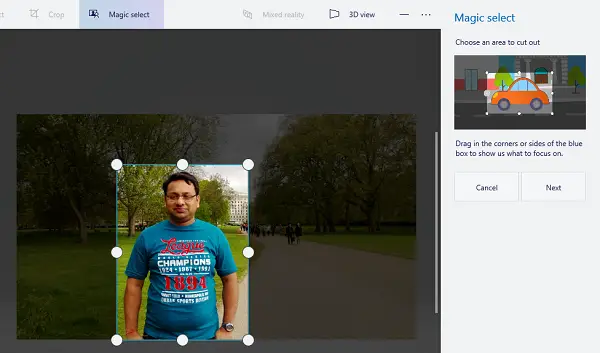
Before we go ahead with the editing, there is a fundamental idea that you should know. Paint 3D uses an algorithm and bit of user input to figure out what should be removed. The less distraction or elements are in your background, the better the result.
When you click Done, the background image will be removed and made transparent – and you will be able to cut the part out of the picture.
How to use the highlighted image?
From here, it will depend on what you plan to do next. If you want only to export the image from which the background image was removed, then click on Menu > New and double-click on the sticker to add it to the image and save it. If you want to insert it into another picture, then first insert the image like before, and then add it to whatever way you think it fits right. Here is the result when I tried with one of the photos I shot in London. I was able to crop out myself from the picture with no background. If you notice, a cutout image of myself is in the Stickers section. Then I opened the same image and added the sticker, so there are two of me.
You can apply the same technique to another image. For example, if you are not in a photo, then use the same method to add yourself to that image. Since there is no background, it will blend well. There are corner-level errors in the image. To perfect it you will have to make sure the margins are marked clearly, and you can fix it by manually adding or removing objects. It is straightforward to remove the image Background with Paint 3D in Windows 10. You can even use the 3D feature of the Paint 3D tool to create 3D structures and more. Read: How to make Background Transparent in Paint.