How to post a 3D Photo on Facebook
Before uploading an image as a 3D Photo, you’ll need to create a depth map for that image. Fortunately, Facebook makes the process dead-simple. Plus, it requires no additional tools for the purpose. 3D photos bring scenes to life with depth and movement. Let us create one!
1] Create a depth map for an image
A depth map for an image can be created by simply appending “_depth” to the file name (example: myImage_depth.png). Make sure it has the same aspect ratio as the image you’re using. Once done, place both the files in the same folder (create a new one) and save it at a suitable location. You can choose to save the 2 files in either,
.png format.jpg format
2] Upload depth map & image simultaneously to Facebook
Having completed the above steps, open your Facebook account, click Photo/Video at the top of your News Feed, a group or your Page. Select your two files (the image and the depth map), then drag and drop your files onto your post.
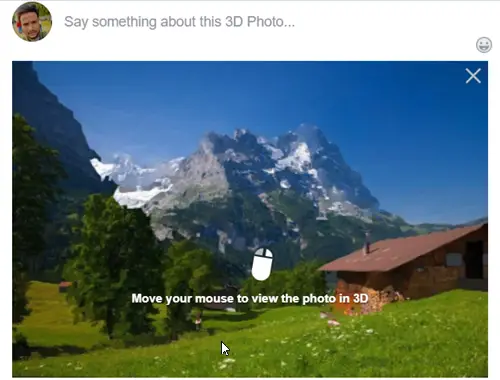
When the files are added to your post, the 3D image will be created.
3] Post 3D image
Once the 3D image is created, it’s ready to be posted, Hit the ‘Post’ button. You can now scroll, pan and tilt to see the photo in realistic 3D—like you’re looking through a window. I hope that you can get it working.