How to compress videos using HandBrake on Windows 11/10
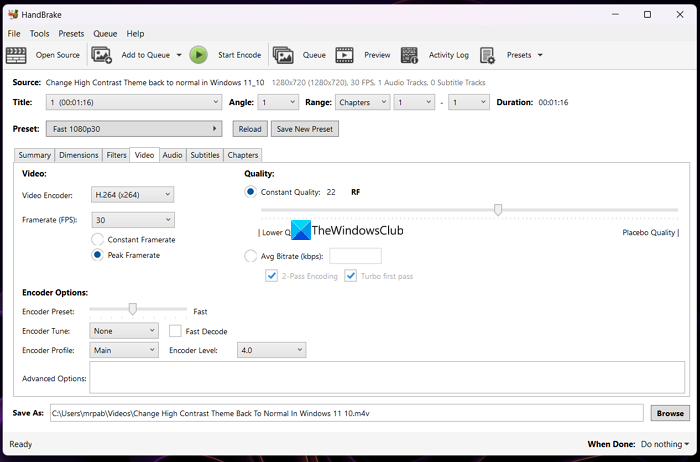
To compress a video using HandBrake, you can use different presets built-in with the program. You can also tweak a few settings and compress the video.To compress a video using HandBrake on Windows 11/10, Let’s get into the details of the process and compress the video on HandBrake. To get started, open the HandBrake program on your PC and import the video using the File button on the Start screen of HandBrake. You will see the preview of your video in the Souce Preview tab. Click on the drop-down button beside Preset and select a preset you want to convert and compress your video into. Then, click on the Video tab and adjust the Frame rate, and Quality there. In the same way, adjust the audio codec, and bitrate in the Audio tab. You need to keep them to an average rate than the settings of the original video to compress it. After you are done adjusting settings, click on Start Encode. It will export the video for a few minutes and save it in the default export folder.
This way you can convert your video into any format and compress it to save size on your hard drive without losing much quality on HandBrake.
How to trim videos using HandBrake on Windows 11/10
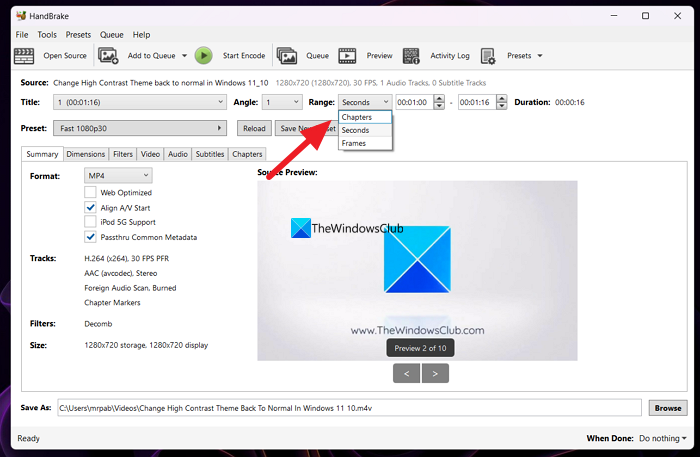
You can trim videos on HandBrake easily in a few steps. The only drawback of trimming a video on HandBrake is that you cannot see the preview of the trimmed video before trimming it. You need to remember the exact time stamps of the video you want to trim by playing it on another video player on your PC. Then, you have to enter the time stamps in HandBrake and save the video. You can trim video on HandBrake by Chapters, Seconds, and Frames. To trim a video on HandBrake,
Open the video on HandBrakeSelect the way you want to trim beside RangeEnter the details to trim the videoClick Start Encode to save it
Let’s get into the details of the process and trim a video on HandBrake. To begin with, open the video you want to trim on HandBrake using the File menu. Then, select the Preset you want to save the video in by clicking on the drop-down button beside Preset. Then, select the Range of videos to trim by clicking on the drop-down button beside Range. If you select Chapters you will see two drop-down buttons to select start and end chapters to trim. If you select Seconds, you need to enter the time stamps by milliseconds to trim the video correctly. You need to note the time stamps down by playing the video on another media player. If you select Frames, you need to enter the starting and ending frame numbers which would be a difficult task for a layman.
Once you have selected the range of the video to trim, you can adjust the Video and Audio settings if you want to and click on the Start Encode button to save the trimmed video. Read: How to trim Videos using Windows Photos app Video Editor This is how you can use HandBrake to compress and trim your videos on Windows 11/10.
How do I compress a video in Windows 11?
You can use the Video Editor in the Photos app and export the video which automatically compresses the video. If you select a smaller quality than the original video, it will compress it to a smaller level. You can also use Clipchamp Video editor, or HandBrake, a free and open-source program. Fix: HandBrake not working or opening
Can you compress the video with HandBrake?
Yes, you can compress the video with HandBrake with the default presets it comes with. Select a preset and adjust video and audio qualities in those respective tabs and click on Start Encode to save the compressed video. You can also create your own preset to compress a video on HandBrake. Related read: Best free Open Source Video Converter software for Windows PC.