How to always open PDF files in Protected View in Word
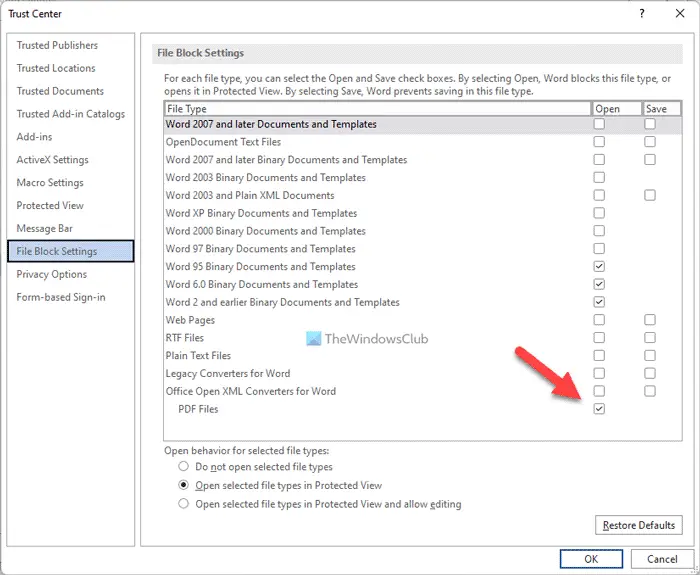
To always open PDF files in Protected View in Word, follow these steps: To know more about these above-mentioned steps, keep reading. First, open Microsoft Word on your computer and click on the Options to open the Word Options panel. Then, go to the Trust Center tab and click on the Trust Center Settings button. Following that, go to the File Block Settings tab and make sure that the Open selected file types in Protected View setting is selected.
If so, tick the Open checkbox of PDF Files. Click the OK button to save the change.
How to always open PDF files in Protected View in Word using Group Policy
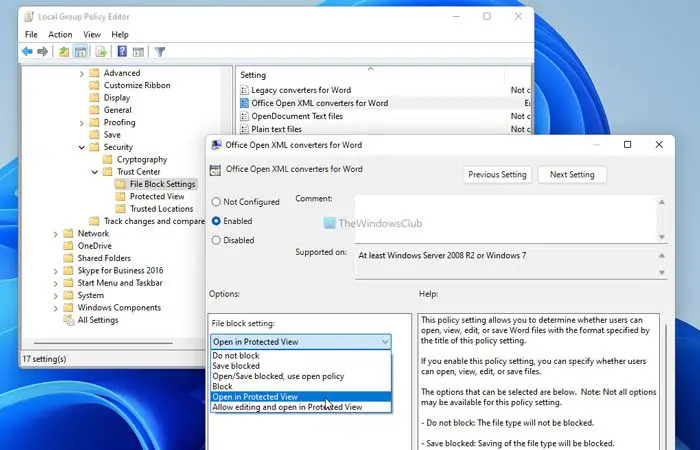
To always open PDF files in Protected View in Word using Group Policy, follow these steps: To find out more about these steps, read on. First, you need to open the Local Group Policy Editor on your computer. To do that, search for gpedit or gpedit.msc in the Taskbar search box and click on the individual search result. Then, navigate to the following path: Then, double-click on the Office Open XML converters for Word setting and choose the Enabled option.
After that, expand the drop-down list and choose the Open in Protected View option. Finally, click the OK button and restart the Microsoft Word app. Note: If you want to set the original setting, you can open the same setting in the Local Group Policy Editor, and select the Not Configured option.
How to always open PDF files in Protected View in Word using Registry
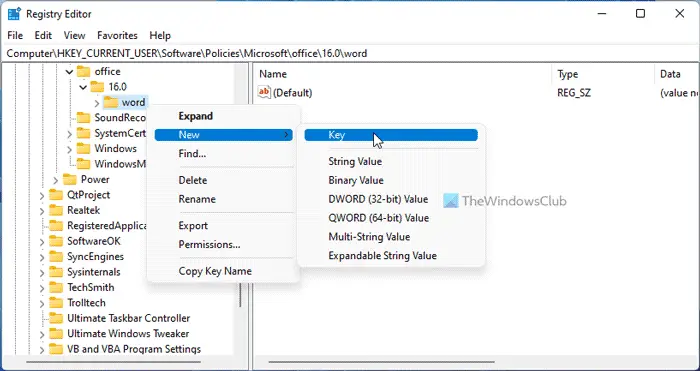
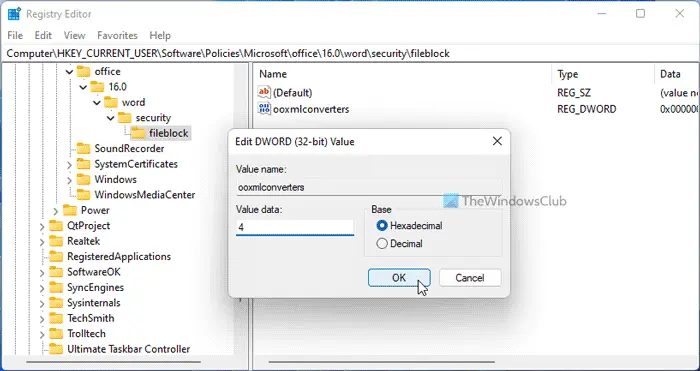
To always open PDF files in Protected View in Word using Registry, follow these steps: Let’s check out these steps in detail. To get started, press Win+R > type regedit > hit the Enter button, and click the Yes option in the UAC prompt to open the Registry Editor. Then, go to this path: However, if you cannot find it in the Registry Editor, you need to create it manually. For that, right-click on Microsoft > New > Key and name it as office. Then, repeat the same steps to create all the other keys. Once done, right-click on word > New > Key and set the name as security.
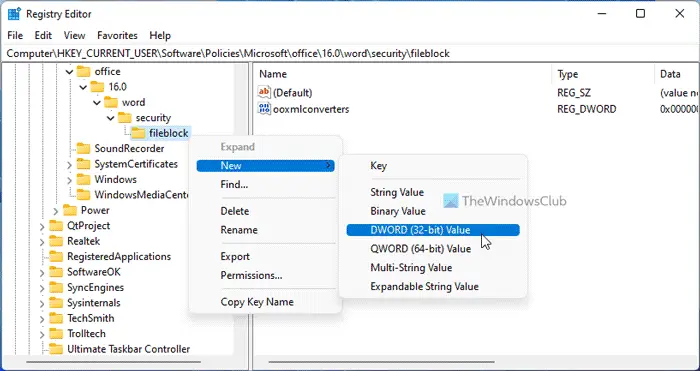
Repeat these steps to create another sub-key under security and name it as fileblock. Right-click on fileblock > New > DWORD (32-bit) Value and set the name as ooxmlconverters.
Double-click on it to set the Value data as 4 and click the OK button.
Close all windows and restart your computer to get the change. However, if you want to revert to the original setting, you need to delete this REG_DWORD value. For that, right-click on the ooxmlconvertes, select the Delete option and click the Yes button.
How do I stop PDF from opening in Protected View?
To stop PDF from opening in Protected View in Word, you can follow the aforementioned steps. In the Word Options panel, you need to go to Trust Center > Trust Center Settings > File Block Settings. Then, remove the tick from the PDF Files checkbox in the Open column. Before that, make sure you have selected the Open selected file types in Protected View option.
How do I force a PDF to open at a specific view?
To force a PDF to open a specific view in Word, you need to use the Local Group Policy Editor or Registry Editor. In the GPEDIT, open the Office Open XML converters for Word setting and choose the Enabled option. Then, select an option from the drop-down list as per your requirements. That’s all! Hope this guide helped. Read: Prevent Word, Excel, PowerPoint from hyperlinking screenshots automatically.