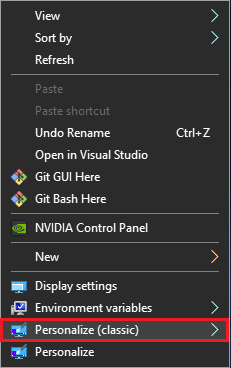
The option for Personalization includes certain appearance settings of our system. It includes settings for desktop background, sound, screen saver, icons, mouse pointer, themes, etc. The new option in the context menu will appear as Personalize (classic). It will open the personalization settings directly from their classic Control Panel location instead of from the Settings app. Since all these settings are moved to the Settings App, you can easily use the steps given below to have it in the old, classic way.
Add ‘Personalize (Classic)’ to Context Menu in Windows 10
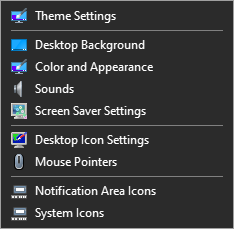
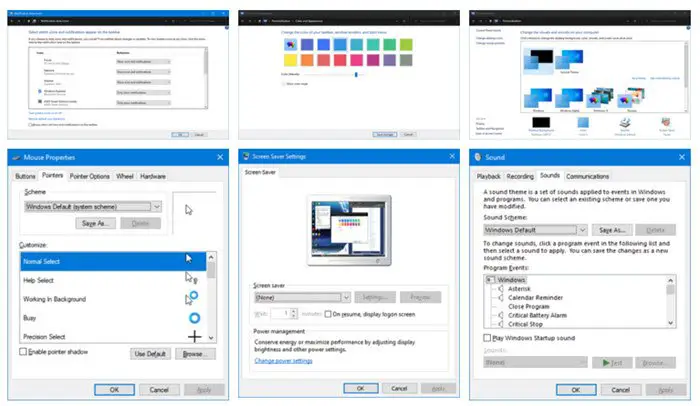
To be able to add the option of Personalize (classic) in the context menu, download these Registry files from our servers. Now create a system restore point first and then follow the steps given below. Before you check that the above steps worked for you or not, restart your system once. Now, go to the desktop and right-click on a blank space. You will find the option of Personalize (classic). The option will have sub-items having different types of appearance settings. It will include Theme Settings, Desktop Background, Color and Appearance, Sounds, Screen Saver Settings, and many more.
Remove Personalize (Classic) from the Context Menu
When you are done with the addition or removal of the option from the context menu you can delete the downloaded files. However, the old option of Personalize will still be present there even if you add or remove Personalize (classic) from the menu. Warning: It is suggested that you should not alter the registry files on your own unless you know how it works. Any changes to them can damage your system. Related Read: How to add any application to the right-click menu.