Convert Audio and Video with HitPaw Video Converter
From our understanding, you can even convert video to audio, and better yet, the tool leaves no watermark. So as it stands at the time of writing, you can get the job done with HitPaw Video Converter without ever having to worry about the quality of the finished product. One of the good things about this program is the ability to convert content to any video or audio format. If you want to perform a batch conversion, the tool is capable of accomplishing that as well.
Download HitPaw Video Converter
Before we can push forward, you must first download the tool and install it on your computer. This is easily done by visiting the official website, then hit the download link. Once on your computer, run the file to install it in no time.
Have a look at the graphical user interface
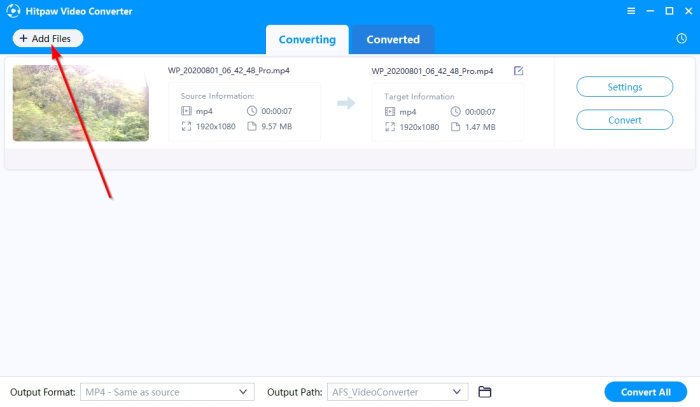
After installing and opening the tool for the first time, the GUI should be the first thing your eyes come upon. We like it because it is simple with no confusing elements. All the important aspects of the program are located right here, so there is no need to go deep within menus. The blue and white color choice is quite pleasing to the eyes, that’s for sure. However, we would have preferred if the developers had added the ability to change the look to something more akin to the taste of the user.
Click on Add Files
The first thing you will want to do before converting content is to add files to the work area. You can do this by clicking on the Add Files button at the top-left corner. Once that is done, select your files then hit open. Alternatively, you could drag and drop all files to the workspace. Yes, it’s that easy.
Change the settings
Before converting the newly added files, please click on the Settings button. From here, you can determine the Target Information from a list of options. For example, if you want to convert an MP4 video to AVI at a particular resolution, then you must make those changes via Settings.
Choose the output path
By default, when a file is converted, it will save itself in a folder called AFS_VideoConverter, which is located in the default Video folder in Windows 10. Now, you can change this if you want. Simply click on the arrow pointing downwards, then select Other. From there, go on ahead and choose your preferred output path for all converted files.
Convert your content
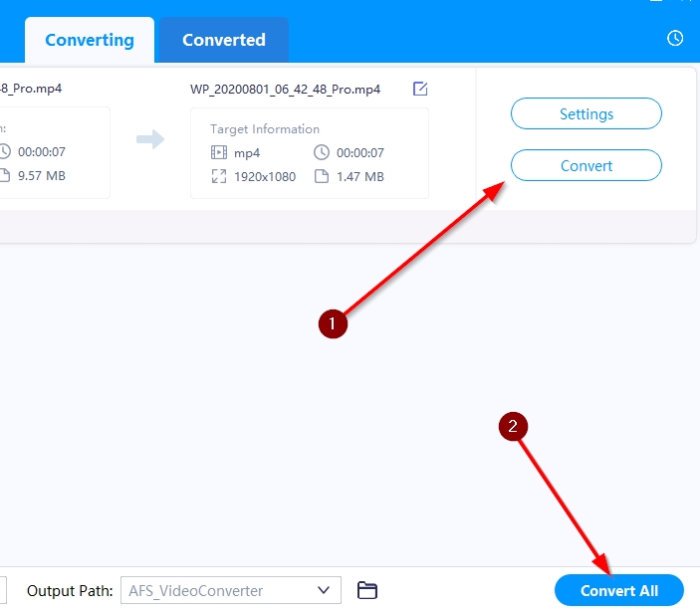
After you’ve completed the configuration, it’s now time to convert your file(s). If you’re converting a single video or audio file, please click on Convert. However, if you’re doing a batch conversion, select Convert All at the bottom. Depending on the size of the files you’re converting, it may take a while to finish. But once they’re done, you can look at a list of all converted content via the Converted tab. There are some more free media converter software here that may interest you.


