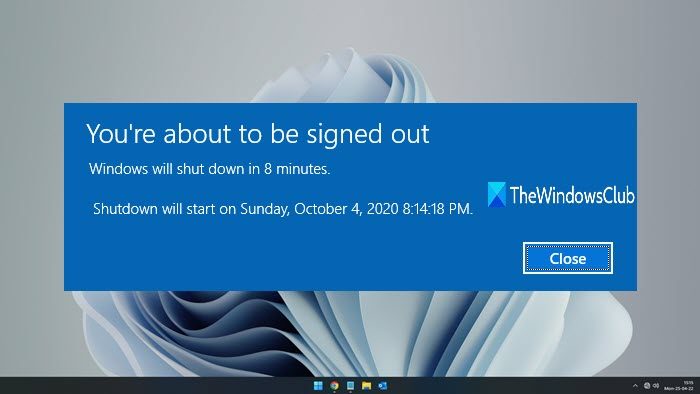
Scheduling shut down can come in handy when you have to leave your PC/laptop for some reason but can’t close it before some work (like downloading) is going on. In that case, you can simply set a timer so that Windows can shut down the PC at the selected time. Though you can use Windows Task Scheduler to schedule shut down, Command Prompt method is another option you can try which is simpler. In the image above, you can see a message is displayed that shutdown is scheduled for the entered time.
Schedule a Shutdown in Windows 11/10
You can schedule an Automatic Shutdown in Windows 11/10 using Command Prompt using the following steps: This basic step requires CMD window. Just type cmd in Run Command (Win+R) box or Search box and press Enter. After opening the CMD window, type and execute the following command:
Replace yyyy with numbers like 500 or 3600 or anything else. Here, yyyy is in seconds. So, if have entered 60 that simply means 60 seconds or 1 minute. Now you will see a message that Windows will shut down in time set by you. You can close that message. You need to repeat the above steps whenever you have to schedule an automatic shutdown for the next time.
Read: Shutdown options in the Command Prompt.
Cancel a scheduled auto shutdown
You can also cancel a scheduled shutdown. If some shut down is already scheduled, you can’t add another shutdown timer. In that case, you need to cancel the scheduled shutdown. To cancel or abort shut down, simply execute this command: That’s all. There are some free third-party tools to schedule shut down also available, but using the Command Prompt is a very simple and a built-in option.