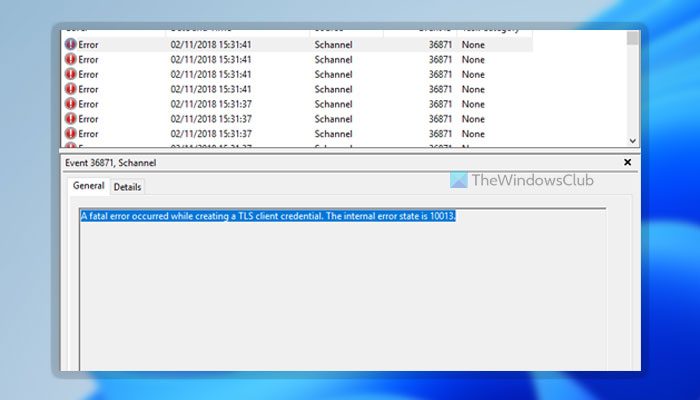
The entire error message says: This error appears on your computer when you do not have the TLS 1.0 and TLS 1.1 enabled. Although some programs may not require when you have TLS 1.2 or TLS 1.3, some old programs might need them for connecting to the internet. If it happens, you can get rid of this error with the help of these solutions.
A fatal error occurred while creating a TLS client credential
To fix A fatal error occurred while creating a TLS client credential, The internal error state is 10013 while creating a TLS client credential error, follow these steps: To learn more about these steps, continue reading.
1] Enable TLS 1.0/1.1 using Internet Properties
As said earlier, you need to enable or turn on TLS 1.0 and TLS 1.1 on your computer in order to fix this issue. As these are not enabled by default on Windows 11 and Windows 10, you need to do that manually. For that, you can get the help of the Internet Properties panel. In order to enable TLS 1.0/1.1 on Windows 11/10, do the following:
Search for internet properties in the Taskbar search box.Click on the individual search result.Switch to the Advanced tab.Find the TLS 1.0 and TLS 1.1.Tick both checkboxes.Click the OK button.
You may need to restart your computer to get the job done. Once done, you won’t find the aforementioned error message. To verify that, you can open the Event Viewer and check if the problem is resolved or not. However, this needs to be a temporary measure only, as it is not very secure to use TLS 1.10 and TLS 1.1 for long.
2] Change values in the Registry
If you get the above-mentioned error, a simple change in the Registry file could fix the issue. However, you may need to create some keys and REG_DWORD values as well. Whether it is Windows 11, Windows 10, or any other older version, you can do the following: Press Win+R to open the Run prompt. Type regedit > click the OK button > click the Yes option. Navigate to this path: Right-click on Protocols > New > Key and name it as TLS 1.2. Right-click on TLS 1.2 > New > Key and name it as Client. Right-click on Client > New > DWORD (32-bit) Value. Set the name as DisabledByDefault. Right-click on Client > New > DWORD (32-bit) Value. Set the name as Enabled. Double-click on it to set the Value data as 1. Click the OK button. Finally, restart your computer. Once done, your computer won’t show such error messages in the Event Viewer anymore.
How do you check if TLS 1.2 is enabled?
The easiest way to check if TLS 1.2 is enabled or not on Windows 11/10 PC. You can use the Internet Properties panel. For that, press Win+R to open the Run prompt, type inetcpl.cpl, and hit the Enter button. Then, switch to the Advanced tab and navigate to the Security section. Now, check if the Use TLS 1.2 checkbox is enabled or not. If ticked, TLS 1.2 is turned on.
How do you check if TLS 1.0 is enabled on server?
To check if TLS 1.0 is enabled on the server or not, you can use the same steps as above. Having said that, you can search for internet properties in the Taskbar search box and click on the individual search box. Go to the Advanced tab and check if the Use TLS 1.0 checkbox is enabled or not. That’s all! Hope this guide helped. Read: How to disable TLS 1.0 in Windows 11/10.

